iOSアプリケーションの構築
iOSアプリケーションの構築
Section titled “iOSアプリケーションの構築”このチュートリアルでは、ONNX Runtimeのオンデバイストレーニングソリューションを組み込んだiOSアプリケーションを構築する方法を探ります。オンデバイストレーニングとは、クラウドサービスや外部サーバーに依存せず、エッジデバイス上で直接機械学習モデルをトレーニングするプロセスを指します。
このチュートリアルでは、話者の声を識別することを学習する簡単な話者識別アプリを構築します。オンデバイスでモデルをトレーニングし、トレーニングされたモデルをエクスポートし、トレーニングされたモデルを使用して推論を実行する方法を見ていきます。
アプリケーションは次のようになります:

オンデバイストレーニング技術を使用して、簡単な音声分類モデルをトレーニングできるiOSアプリケーションを構築するプロセスを案内します。このチュートリアルでは、転移学習技術を紹介します。これは、1つのタスクでモデルをトレーニングすることから得られた知識を活用して、異なるが関連するタスクでモデルのパフォーマンスを向上させる手法です。学習プロセスをゼロから開始する代わりに、転移学習により、事前トレーニングされたモデルによって学習された知識や特徴を新しいタスクに転移させることができます。
このチュートリアルでは、VoxCeleb1などの大規模な有名人音声データでトレーニングされたwav2vecモデルを活用します。事前トレーニングされたモデルを使用して音声データから特徴を抽出し、話者を識別するためのバイナリ分類器をトレーニングします。モデルの初期層は特徴抽出器として機能し、音声データの重要な特徴をキャプチャします。モデルの最後の層のみが分類タスクを実行するためにトレーニングされます。
このチュートリアルでは、以下を行います:
- iOS音声APIを使用してトレーニング用の音声データをキャプチャする
- オンデバイスでモデルをトレーニングする
- トレーニングされたモデルをエクスポートする
- エクスポートされたモデルを使用して推論を実行する
- TOCプレースホルダー
このチュートリアルに従うには、機械学習とiOS開発の基本的な理解が必要です。また、マシンに以下がインストールされている必要があります:
注: 完全なiOSアプリケーションも
onnxruntime-training-examplesGitHubリポジトリで利用できます。リポジトリをクローンして、チュートリアルに従うことができます。
トレーニングアーティファクトの生成
Section titled “トレーニングアーティファクトの生成”-
モデルをONNXにエクスポートする
Section titled “モデルをONNXにエクスポートする”HuggingFaceからの事前トレーニングされたモデルから開始し、ONNXにエクスポートします。
wav2vecモデルは1000以上のカテゴリを持つVoxCeleb1で事前トレーニングされています。このタスクでは、音声を2クラスに分類するだけでよいため、モデルの最後の層を2クラスを出力するように変更します。transformersライブラリを使用してモデルを読み込み、ONNXにエクスポートします。from transformers import Wav2Vec2ForSequenceClassification, AutoConfigimport torch# load config from the pretrained modelconfig = AutoConfig.from_pretrained("superb/wav2vec2-base-superb-sid")model = Wav2Vec2ForSequenceClassification.from_pretrained("superb/wav2vec2-base-superb-sid")# modify last layer to output 2 classesmodel.classifier = torch.nn.Linear(256, 2)#export model to ONNXdummy_input = torch.randn(1, 160000, requires_grad=True)torch.onnx.export(model, dummy_input, "wav2vec.onnx",input_names=["input"], output_names=["output"],dynamic_axes={"input": {0: "batch"}, "output": {0: "batch"}}) -
トレーニング可能なパラメータとトレーニング不可能なパラメータを定義する
Section titled “トレーニング可能なパラメータとトレーニング不可能なパラメータを定義する”import onnx# load the onnx modelonnx_model = onnx.load("wav2vec.onnx")# Define the parameters that require gradients to be computed (trainable parameters) and# those that don't (frozen/non-trainable parameters)requires_grad = ["classifier.weight", "classifier.bias"]frozen_params = [param.namefor param in onnx_model.graph.initializerif param.name not in requires_grad] -
トレーニングアーティファクトを生成する
Section titled “トレーニングアーティファクトを生成する”このチュートリアルでは、
CrossEntropyLoss損失とAdamWオプティマイザーを使用します。アーティファクト生成の詳細についてはこちらを参照してください。モデルはロジットと隠れ状態も出力するため、
onnxblockを使用して、モデル出力からロジットを抽出し、CrossEntropyLoss関数に渡すカスタム損失関数を定義します。import onnxruntime.training.onnxblock as onnxblockfrom onnxruntime.training import artifacts# define the loss functionclass CustomCELoss(onnxblock.Block):def __init__(self):super().__init__()self.celoss = onnxblock.loss.CrossEntropyLoss()def build(self, logits, *args):return self.celoss(logits)# Generate the training artifactsartifacts.generate_artifacts(onnx_model,requires_grad=requires_grad,frozen_params=frozen_params,loss=CustomCELoss(),optimizer=artifacts.OptimType.AdamW,artifact_directory="artifacts",)以上です!トレーニングアーティファクトが
artifactsディレクトリに生成されました。アーティファクトはトレーニングのためにiOSデバイスにデプロイする準備ができています。
iOSアプリケーションの構築
Section titled “iOSアプリケーションの構築”Xcodeセットアップ
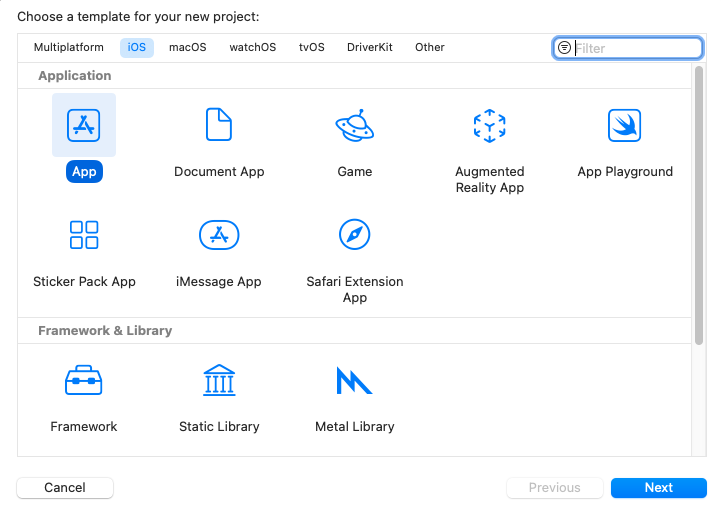
Section titled “Xcodeセットアップ”Xcodeを開き、新しいプロジェクトを作成します。プラットフォームとしてiOSを選択し、テンプレートとしてAppを選択します。次へをクリックします。
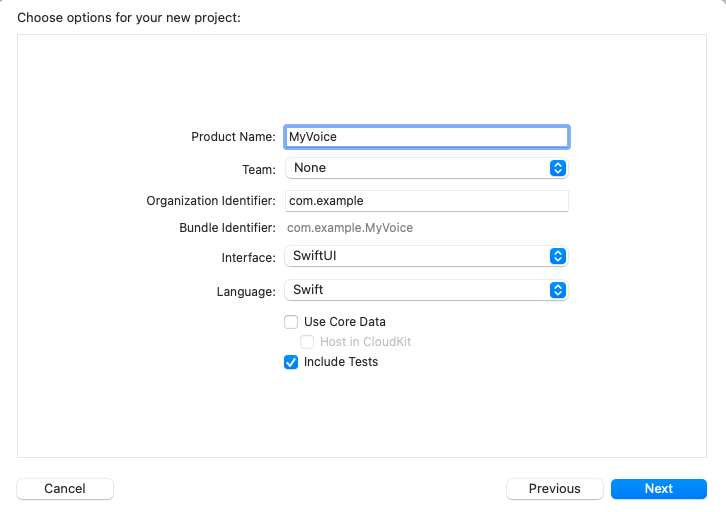
プロジェクト名を入力します。ここでは、プロジェクトを’MyVoice’と名付けますが、任意の名前を付けることができます。インターフェースとしてSwiftUIを選択し、言語としてSwiftを選択してください。次へをクリックします。
プロジェクトを保存する場所を選択し、作成をクリックします。
次に、プロジェクトにonnxruntime-training-objcポッドを追加する必要があります。依存関係を追加するためにCocoaPodsを使用します。CocoaPodsがインストールされていない場合は、インストール手順をこちらで確認できます。
CocoaPodsをインストールした後、プロジェクトディレクトリに移動し、次のコマンドを実行してPodfileを作成します:
pod initこれにより、プロジェクトディレクトリにPodfileが作成されます。Podfileを開き、use_frameworks!行の後に次の行を追加します:
pod `onnxruntime-training-objc`, `~> 1.16.0`Podfileを保存し、次のコマンドを実行して依存関係をインストールします:
pod installこれにより、プロジェクトディレクトリにMyVoice.xcworkspaceファイルが作成されます。Xcodeでxcworkspaceファイルを開きます。これにより、CocoaPods依存関係が利用可能な状態でXcodeでプロジェクトが開きます。
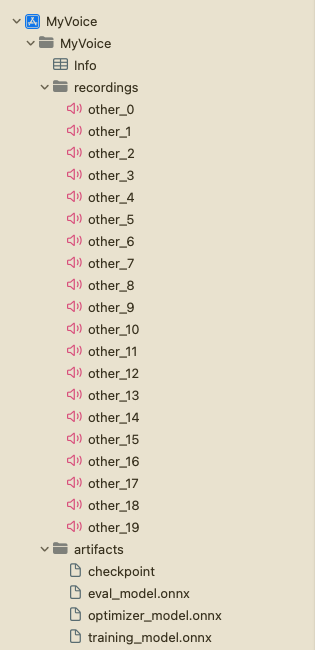
次に、プロジェクトナビゲーターで’MyVoice’グループを右クリックし、‘New Group’をクリックして、artifactsという新しいグループをプロジェクトに作成します。前のセクションで生成されたアーティファクトをartifactsグループにドラッグアンドドロップします。Create folder referencesとCopy items if neededオプションを選択してください。これにより、アーティファクトがプロジェクトに追加されます。
次に、‘MyVoice’グループを右クリックし、‘New Group’をクリックして、プロジェクトにrecordingsという新しいグループを作成します。このグループには、トレーニングに使用される音声録音が含まれます。プロジェクトのルートでrecording_gen.pyスクリプトを実行して録音を生成できます。または、トレーニングに使用する予定の話者以外の他の話者の音声録音を使用することもできます。録音が16KHzサンプルレートの.wav形式で10秒のモノチャネルであることを確認してください。さらに、録音にother_0.wav、other_1.wavなどの名前を付け、recordingsグループに追加することを確認してください。
プロジェクト構造は次のようになります:
アプリケーション概要
Section titled “アプリケーション概要”アプリケーションは、2つのメインUIビューで構成されます:TrainViewとInferView。TrainViewはオンデバイスでモデルをトレーニングするために使用され、InferViewはトレーニングされたモデルで推論を実行するために使用されます。さらに、アプリケーションのホームビューであるContentViewがあり、TrainViewとInferViewに移動するボタンが含まれています。
さらに、マイクを通じて音声を録音するためのAudioRecorderクラスも作成します。10秒の音声を録音し、音声データをDataオブジェクトとして出力します。これは、トレーニングと推論の目的で使用できます。
モデルのトレーニングとエクスポートを処理するTrainerクラスがあります。
最後に、トレーニングされたモデルで推論を処理するVoiceIdentifierクラスも作成します。
モデルのトレーニング
Section titled “モデルのトレーニング”まず、モデルのトレーニングとエクスポートを処理するTrainerクラスを作成します。トレーニングアーティファクトを読み込み、指定された音声でモデルをトレーニングし、ONNX RuntimeオンデバイストレーニングAPIを使用してトレーニングされたモデルをエクスポートします。APIの詳細なドキュメントはこちらにあります。
Trainerクラスには、次のパブリックメソッドがあります:
init()- トレーニングセッションを初期化し、トレーニングアーティファクトを読み込みます。train(_ trainingData: [Data])- 指定されたユーザー音声データでモデルをトレーニングします。各Dataオブジェクトがユーザーの音声データを表すDataオブジェクトの配列を受け取り、いくつかの事前録音された音声データと一緒に使用してモデルをトレーニングします。exportModelForInference()- 推論目的でトレーニングされたモデルをエクスポートします。
-
トレーニングアーティファクトの読み込みとトレーニングセッションの初期化
Section titled “トレーニングアーティファクトの読み込みとトレーニングセッションの初期化”モデルをトレーニングするには、まずアーティファクトを読み込み、
ORTEnv、ORTTrainingSession、およびORTCheckpointを作成する必要があります。これらのオブジェクトは、モデルをトレーニングするために使用されます。これらのオブジェクトをTrainerクラスのinitメソッドで作成します。import Foundationimport onnxruntime_training_objcclass Trainer {private let ortEnv: ORTEnvprivate let trainingSession: ORTTrainingSessionprivate let checkpoint: ORTCheckpointenum TrainerError: Error {case Error(_ message: String)}init() throws {ortEnv = try ORTEnv(loggingLevel: ORTLoggingLevel.warning)// get path for artifactsguard let trainingModelPath = Bundle.main.path(forResource: "training_model", ofType: "onnx") else {throw TrainerError.Error("Failed to find training model file.")}guard let evalModelPath = Bundle.main.path(forResource: "eval_model",ofType: "onnx") else {throw TrainerError.Error("Failed to find eval model file.")}guard let optimizerPath = Bundle.main.path(forResource: "optimizer_model", ofType: "onnx") else {throw TrainerError.Error("Failed to find optimizer model file.")}guard let checkpointPath = Bundle.main.path(forResource: "checkpoint", ofType: nil) else {throw TrainerError.Error("Failed to find checkpoint file.")}checkpoint = try ORTCheckpoint(path: checkpointPath)trainingSession = try ORTTrainingSession(env: ortEnv, sessionOptions: ORTSessionOptions(), checkpoint: checkpoint, trainModelPath: trainingModelPath, evalModelPath: evalModelPath, optimizerModelPath: optimizerPath)}} -
モデルのトレーニング
Section titled “モデルのトレーニング”a. モデルをトレーニングする前に、前のセクションで作成したwavファイルからデータを抽出する必要があります。wavファイルからデータを抽出する簡単な関数を次に示します。
private func getDataFromWavFile(fileName: String) throws -> (AVAudioBuffer, Data) {guard let fileUrl = Bundle.main.url(forResource: fileName, withExtension:"wav") else {throw TrainerError.Error("Failed to find wav file: \(fileName).")}let audioFile = try AVAudioFile(forReading: fileUrl)let format = audioFile.processingFormatlet totalFrames = AVAudioFrameCount(audioFile.length)guard let buffer = AVAudioPCMBuffer(pcmFormat: format, frameCapacity: totalFrames) else {throw TrainerError.Error("Failed to create audio buffer.")}try audioFile.read(into: buffer)guard let floatChannelData = buffer.floatChannelData else {throw TrainerError.Error("Failed to get float channel data.")}let data = Data(bytesNoCopy: floatChannelData[0],count: Int(buffer.frameLength) * MemoryLayout<Float>.size,deallocator: .none)return (buffer, data)}b.
TrainingSession.trainStep関数は、モデルのトレーニングを担当します。入力データとラベルを受け取り、損失を返します。入力はORTValueオブジェクトとしてONNX Runtimeに渡されます。したがって、入力音声DataオブジェクトとラベルをORTValueに変換する必要があります。private func getORTValue(dataList: [Data]) throws -> ORTValue {let tensorData = NSMutableData()dataList.forEach {data in tensorData.append(data)}let inputShape: [NSNumber] = [dataList.count as NSNumber, dataList[0].count / MemoryLayout<Float>.stride as NSNumber]return try ORTValue(tensorData: tensorData, elementType: ORTTensorElementDataType.float, shape: inputShape)}private func getORTValue(labels: [Int64]) throws -> ORTValue {let tensorData = NSMutableData(bytes: labels, length: labels.count * MemoryLayout<Int64>.stride)let inputShape: [NSNumber] = [labels.count as NSNumber]return try ORTValue (tensorData: tensorData, elementType: ORTTensorElementDataType.int64, shape: inputShape)}c.
trainStep関数を作成する準備が整いました。この関数は、入力データとラベルのバッチを受け取り、指定されたバッチに対して1つのトレーニングステップを実行します。func trainStep(inputData: [Data], labels: [Int64]) throws {let inputs = [try getORTValue(dataList: inputData), try getORTValue(labels: labels)]try trainingSession.trainStep(withInputValues: inputs)// update the model paramstry trainingSession.optimizerStep()// reset the gradientstry trainingSession.lazyResetGrad()}d. 最後に、トレーニングループを作成するために必要なすべてが揃いました。ここで、
kNumOtherRecordingsは、以前に作成したrecordingsディレクトリにある録音の数を表します。kNumEpochsは、指定されたデータでモデルをトレーニングするエポック数を表します。kUserIndexとkOtherIndexは、それぞれユーザーと他の録音のラベルを表します。また、各トレーニングステップの後に呼び出される
progressCallbackもあります。このコールバックを使用して、UIのプログレスバーを更新します。private let kNumOtherRecordings: Int = 20private let kNumEpochs: Int = 3let kUserIndex: Int64 = 1let kOtherIndex: Int64 = 0func train(_ trainingData: [Data], progressCallback: @escaping (Double) -> Void) throws {let numRecordings = trainingData.countvar otherRecordings = Array(0..<kNumOtherRecordings)for e in 0..<kNumEpochs {print("Epoch: \(e)")otherRecordings.shuffle()let otherData = otherRecordings.prefix(numRecordings)for i in 0..<numRecordings {let (buffer, wavFileData) = try getDataFromWavFile(fileName: "other_\(otherData[i])")try trainStep(inputData: [trainingData[i], wavFileData], labels: [kUserIndex, kOtherIndex])print("finished training on recording \(i)")let progress = Double((e * numRecordings) + i + 1) / Double(kNumEpochs * numRecordings)progressCallback(progress)}}} -
トレーニングされたモデルのエクスポート
Section titled “トレーニングされたモデルのエクスポート”ORTTrainingSessionクラスのexportModelForInferenceメソッドを使用して、トレーニングされたモデルをエクスポートできます。このメソッドは、モデルをエクスポートするパスとモデルの出力名を受け取ります。ここでは、モデルをアプリケーションの
Libraryディレクトリにエクスポートします。エクスポートされたモデルは、推論目的で使用されます。func exportModelForInference() throws {guard let libraryDirectory = FileManager.default.urls(for: .libraryDirectory, in: .userDomainMask).first else {throw TrainerError.Error("Failed to find library directory ")}let modelPath = libraryDirectory.appendingPathComponent("inference_model.onnx").pathtry trainingSession.exportModelForInference(withOutputPath: modelPath, graphOutputNames: ["output"])}
Trainerクラスの完全な実装はこちらで見つけることができます。
トレーニングされたモデルでの推論
Section titled “トレーニングされたモデルでの推論”VoiceIdentifierクラスは、トレーニングされたモデルでの推論を処理します。トレーニングされたモデルを読み込み、指定された音声データで推論を実行します。このクラスには、evaluate(inputData: Data) -> Result<(Bool, Float), Error>メソッドがあり、音声データを受け取り、推論の結果を返します。結果は(Bool, Float)のタプルで、最初の要素は音声がユーザーであると識別されたかどうかを表し、2番目の要素は予測の信頼度スコアを表します。
まず、ORTSessionオブジェクトを使用してトレーニングされたモデルを読み込みます。
class VoiceIdentifier {
    private let ortEnv : ORTEnv    private let ortSession: ORTSession    private let kThresholdProbability: Float = 0.80
    enum VoiceIdentifierError: Error {        case Error(_ message: String)    }
    init() throws {        ortEnv = try ORTEnv(loggingLevel: ORTLoggingLevel.warning)
        guard let libraryDirectory = FileManager.default.urls(for: .libraryDirectory, in: .userDomainMask).first else {            throw VoiceIdentifierError.Error("Failed to find library directory ")        }        let modelPath = libraryDirectory.appendingPathComponent("inference_model.onnx").path
if !FileManager.default.fileExists(atPath: modelPath) { throw VoiceIdentifierError.Error("Failed to find inference model file.") } ortSession = try ORTSession(env: ortEnv, modelPath: modelPath, sessionOptions: nil) }}次に、evaluateメソッドを作成します。まず、音声データを受け取り、ORTValueに変換します。次に、モデルで推論を実行します。最後に、出力からロジットを抽出し、softmaxを適用して確率を取得します。
    private func isUser(logits: [Float]) -> Float {        // apply softMax        let maxInput = logits.max() ?? 0.0        let expValues = logits.map { exp($0 - maxInput) } // Calculate e^(x - maxInput) for each element        let expSum = expValues.reduce(0, +) // Sum of all e^(x - maxInput) values
        return expValues.map { $0 / expSum }[1] // Calculate the softmax probabilities    }
    func evaluate(inputData: Data) -> Result<(Bool, Float), Error> {
        return Result<(Bool, Float), Error> { () -> (Bool, Float) in
            // convert input data to ORTValue            let inputShape: [NSNumber] = [1, inputData.count / MemoryLayout<Float>.stride as NSNumber]
            let input = try ORTValue(                tensorData: NSMutableData(data: inputData),                elementType: ORTTensorElementDataType.float,                shape: inputShape)
            let outputs = try ortSession.run(                withInputs: ["input": input],                outputNames: ["output"],                runOptions: nil)
            guard let output = outputs["output"] else {                throw VoiceIdentifierError.Error("Failed to get model output from inference.")            }
            let outputData = try output.tensorData() as Data            let probUser = outputData.withUnsafeBytes { (buffer: UnsafeRawBufferPointer) -> Float in                let floatBuffer = buffer.bindMemory(to: Float.self)                let logits = Array(UnsafeBufferPointer(start: floatBuffer.baseAddress, count: outputData.count/MemoryLayout<Float>.stride))                return isUser(logits: logits)            }
return (probUser >= kThresholdProbability, probUser) } }VoiceIdentifierクラスの完全な実装はこちらで見つけることができます。
AudioRecorderクラスを使用して、マイクを通じて音声を録音します。10秒の音声を録音し、音声データをDataオブジェクトとして出力します。これは、トレーニングと推論の目的で使用できます。AVFoundationフレームワークを使用してマイクにアクセスし、音声を録音します。record(callback: @escaping RecordingDoneCallback)という1つのパブリックメソッドがあり、音声を録音し、録音が完了したときに音声データでコールバック関数を呼び出します。
import AVFoundationimport Foundation
private let kSampleRate: Int = 16000private let kRecordingDuration: TimeInterval = 10
class AudioRecorder {    typealias RecordResult = Result<Data, Error>    typealias RecordingDoneCallback = (RecordResult) -> Void
    enum AudioRecorderError: Error {        case Error(message: String)    }
    func record(callback: @escaping RecordingDoneCallback) {        let session = AVAudioSession.sharedInstance()        session.requestRecordPermission { allowed in            do {                guard allowed else {                    throw AudioRecorderError.Error(message: "Recording permission denied.")                }
                try session.setCategory(.record)                try session.setActive(true)
                let tempDir = FileManager.default.temporaryDirectory
                let recordingUrl = tempDir.appendingPathComponent("recording.wav")
                let formatSettings: [String: Any] = [                    AVFormatIDKey: kAudioFormatLinearPCM,                    AVSampleRateKey: kSampleRate,                    AVNumberOfChannelsKey: 1,                    AVLinearPCMBitDepthKey: 16,                    AVLinearPCMIsBigEndianKey: false,                    AVLinearPCMIsFloatKey: false,                    AVEncoderAudioQualityKey: AVAudioQuality.high.rawValue,                ]
                let recorder = try AVAudioRecorder(url: recordingUrl, settings: formatSettings)                self.recorder = recorder
                let delegate = RecorderDelegate(callback: callback)                recorder.delegate = delegate                self.recorderDelegate = delegate
                guard recorder.record(forDuration: kRecordingDuration) else {                    throw AudioRecorderError.Error(message: "Failed to record.")                }
                // control should resume in recorder.delegate.audioRecorderDidFinishRecording()            } catch {                callback(.failure(error))            }        }    }
    private var recorderDelegate: RecorderDelegate?    private var recorder: AVAudioRecorder?
    private class RecorderDelegate: NSObject, AVAudioRecorderDelegate {        private let callback: RecordingDoneCallback
        init(callback: @escaping RecordingDoneCallback) {            self.callback = callback        }
        func audioRecorderDidFinishRecording(            _ recorder: AVAudioRecorder,            successfully flag: Bool        ) {            let recordResult = RecordResult { () -> Data in                guard flag else {                    throw AudioRecorderError.Error(message: "Recording was unsuccessful.")                }
                let recordingUrl = recorder.url                let recordingFile = try AVAudioFile(forReading: recordingUrl)
                guard                    let format = AVAudioFormat(                        commonFormat: .pcmFormatFloat32,                        sampleRate: recordingFile.fileFormat.sampleRate,                        channels: 1,                        interleaved: false)                else {                    throw AudioRecorderError.Error(message: "Failed to create audio format.")                }
                guard                    let recordingBuffer = AVAudioPCMBuffer(                        pcmFormat: format,                        frameCapacity: AVAudioFrameCount(recordingFile.length))                else {                    throw AudioRecorderError.Error(message: "Failed to create audio buffer.")                }
                try recordingFile.read(into: recordingBuffer)
                guard let recordingFloatChannelData = recordingBuffer.floatChannelData else {                    throw AudioRecorderError.Error(message: "Failed to get float channel data.")                }
                return Data(bytes: recordingFloatChannelData[0], count: Int(recordingBuffer.frameLength) * MemoryLayout<Float>.size)
            }
            callback(recordResult)        }
        func audioRecorderEncodeErrorDidOccur(            _ recorder: AVAudioRecorder,            error: Error?        ) {            if let error = error {                callback(.failure(error))            } else {                callback(.failure(AudioRecorderError.Error(message: "Encoding was unsuccessful.")))            }        }    }}
Train View
Section titled “Train View”TrainViewは、ユーザーの声でモデルをトレーニングするために使用されます。まず、ユーザーにkNumRecordings回の録音を促します。次に、ユーザーの声といくつかの事前録音された他の話者の声の録音でモデルをトレーニングします。最後に、推論目的でトレーニングされたモデルをエクスポートします。
import SwiftUI
struct TrainView: View {
    enum ViewState {        case recordingTrainingData, trainingInProgress, trainingComplete    }
    private static let sentences = [        "In the embrace of nature's beauty, I find peace and tranquility. The gentle rustling of leaves soothes my soul, and the soft sunlight kisses my skin. As I breathe in the fresh air, I am reminded of the interconnectedness of all living things, and I feel a sense of oneness with the world around me.",        "Under the starlit sky, I gaze in wonder at the vastness of the universe. Each twinkle represents a story yet untold, a dream yet to be realized. With every new dawn, I am filled with hope and excitement for the opportunities that lie ahead. I embrace each day as a chance to grow, to learn, and to create beautiful memories.",        "A warm hug from a loved one is a precious gift that warms my heart. In that tender embrace, I feel a sense of belonging and security. Laughter and tears shared with dear friends create a bond that withstands the test of time. These connections enrich my life and remind me of the power of human relationships.",        "Life's journey is like a beautiful melody, with each note representing a unique experience. As I take each step, I harmonize with the rhythm of existence. Challenges may come my way, but I face them with resilience and determination, knowing they are opportunities for growth and self-discovery.",        "With every page turned in a book, I open the door to new worlds and ideas. The written words carry the wisdom of countless souls, and I am humbled by the knowledge they offer. In stories, I find a mirror to my own experiences and a beacon of hope for a better tomorrow.",        "Life's trials may bend me, but they will not break me. Through adversity, I discover the strength within my heart. Each obstacle is a chance to learn, to evolve, and to emerge as a better version of myself. I am grateful for every lesson, for they shape me into the person I am meant to be.",        "The sky above is an ever-changing canvas of colors and clouds. In its vastness, I realize how small I am in the grand scheme of things, and yet, I know my actions can ripple through the universe. As I walk this Earth, I seek to leave behind a positive impact and a legacy of love and compassion.",        "In the stillness of meditation, I connect with the depth of my soul. The external noise fades away, and I hear the whispers of my inner wisdom. With each breath, I release tension and embrace serenity. Meditation is my sanctuary, a place where I can find clarity and renewed energy.",        "Kindness is a chain reaction that spreads like wildfire. A simple act of compassion can brighten someone's day and inspire them to pay it forward. Together, we can create a wave of goodness that knows no boundaries, reaching even the farthest corners of the world.",        "As the sun rises on a new day, I am filled with gratitude for the gift of life. Every moment is a chance to make a difference, to love deeply, and to embrace joy. I welcome the adventures that await me and eagerly embrace the mysteries yet to be uncovered."    ]

    private let kNumRecordings = 5    private let audioRecorder = AudioRecorder()    private let trainer = try! Trainer()
    @State private var trainingData: [Data] = []
    @State private var viewState: ViewState = .recordingTrainingData    @State private var readyToRecord: Bool = true    @State private var trainingProgress: Double = 0.0
    private func recordVoice() {        audioRecorder.record { recordResult in           switch recordResult {           case .success(let recordingData):               trainingData.append(recordingData)               print("Successfully completed Recording")           case .failure(let error):               print("Error: \(error)")            }
            readyToRecord = true
            if trainingData.count == kNumRecordings  {                viewState = .trainingInProgress                trainAndExportModel()            }        }    }
    private func updateProgressBar(progress: Double) {        DispatchQueue.main.async {            trainingProgress = progress        }    }
    private func trainAndExportModel() {        Task {            do {                try trainer.train(trainingData, progressCallback: updateProgressBar)                try trainer.exportModelForInference()
                DispatchQueue.main.async {                    viewState = .trainingComplete                    print("Training is complete")                }            } catch {                DispatchQueue.main.async {                    viewState = .trainingComplete                    print("Training Failed: \(error)")                }            }        }    }

    var body: some View {        VStack {
            switch viewState {            case .recordingTrainingData:                Text("\(trainingData.count + 1) of \(kNumRecordings)")                    .font(.caption)                    .foregroundColor(.secondary)                    .padding()
                ProgressView(value: Double(trainingData.count),                             total: Double(kNumRecordings))                .progressViewStyle(LinearProgressViewStyle(tint: .purple))                .frame(height: 10)                .cornerRadius(5)
                Spacer()
                Text(TrainView.sentences[trainingData.count % TrainView.sentences.count])                    .font(.body)                    .padding()                    .multilineTextAlignment(.center)                    .fontDesign(.monospaced)
                Spacer()
                ZStack(alignment: .center) {                    Image(systemName: "mic.fill")                        .resizable()                        .aspectRatio(contentMode: .fit)                        .frame(width: 100, height: 100)                        .foregroundColor( readyToRecord ? .gray: .red)                        .transition(.scale)                        .animation(.easeIn, value: 1)                }
                Spacer()
                Button(action: {                    readyToRecord = false                    recordVoice()                }) {                    Text(readyToRecord ? "Record" : "Recording ...")                        .font(.title)                        .padding()                        .background(readyToRecord ? .green : .gray)                        .foregroundColor(.white)                        .cornerRadius(10)                }.disabled(!readyToRecord)
            case .trainingInProgress:                VStack {                    Spacer()                    ProgressView(value: trainingProgress,                                 total: 1.0,                                 label: {Text("Training")},                                 currentValueLabel: {Text(String(format: "%.0f%%", trainingProgress * 100))})                    .padding()                    Spacer()                }
            case .trainingComplete:                Spacer()                Text("Training successfully finished!")                    .font(.title)                    .padding()                    .multilineTextAlignment(.center)                    .fontDesign(.monospaced)
                Spacer()                NavigationLink(destination: InferView()) {                    Text("Infer")                        .font(.title)                        .padding()                        .background(.purple)                        .foregroundColor(.white)                        .cornerRadius(10)                }                .padding(.leading, 20)            }
            Spacer()        }        .padding()        .navigationTitle("Train")    }}
struct TrainView_Previews: PreviewProvider { static var previews: some View { TrainView() }}TrainViewの完全な実装はこちらで見つけることができます。
Infer View
Section titled “Infer View”最後に、トレーニングされたモデルで推論を実行するために使用されるInferViewを作成します。ユーザーに声を録音するように促し、トレーニングされたモデルで推論を実行します。その後、推論の結果を表示します。
import SwiftUI
struct InferView: View {
    enum InferResult {        case user, other, notSet    }
    private let audioRecorder = AudioRecorder()
    @State private var voiceIdentifier: VoiceIdentifier? = nil    @State private var readyToRecord: Bool = true
    @State private var inferResult: InferResult = InferResult.notSet    @State private var probUser: Float = 0.0
    @State private var showAlert = false    @State private var alertMessage = ""
    private func recordVoice() {        audioRecorder.record { recordResult in            let recognizeResult = recordResult.flatMap { recordingData in                return voiceIdentifier!.evaluate(inputData: recordingData)            }            endRecord(recognizeResult)        }    }
    private func endRecord(_ result: Result<(Bool, Float), Error>) {        DispatchQueue.main.async {            switch result {            case .success(let (isMatch, confidence)):                print("Your Voice with confidence: \(isMatch),  \(confidence)")                inferResult = isMatch ? .user : .other                probUser = confidence            case .failure(let error):                print("Error: \(error)")            }            readyToRecord = true        }    }
    var body: some View {        VStack {            Spacer()
            ZStack(alignment: .center) {                Image(systemName: "mic.fill")                    .resizable()                    .aspectRatio(contentMode: .fit)                    .frame(width: 100, height: 100)                    .foregroundColor( readyToRecord ? .gray: .red)                    .transition(.scale)                    .animation(.easeInOut, value: 1)            }
            Spacer()
            Button(action: {                readyToRecord = false                recordVoice()            }) {                Text(readyToRecord ? "Record" : "Recording ...")                    .font(.title)                    .padding()                    .background(readyToRecord ? .green : .gray)                    .foregroundColor(.white)                    .cornerRadius(10)
            }.disabled(voiceIdentifier == nil || !readyToRecord)                .opacity(voiceIdentifier == nil ? 0.5: 1.0)
            if  inferResult != .notSet {                Spacer()                ZStack (alignment: .center) {                    Image(systemName: inferResult == .user ? "person.crop.circle.fill.badge.checkmark": "person.crop.circle.fill.badge.xmark")                        .resizable()                        .aspectRatio(contentMode: .fit)                        .frame(width: 100, height: 100)                        .foregroundColor(inferResult == .user ? .green : .red)                        .animation(.easeInOut, value: 2)
                }
                Text("Probability of User : \(String(format: "%.2f", probUser*100.0))%")                    .multilineTextAlignment(.center)                    .fontDesign(.monospaced)            }
            Spacer()        }        .padding()        .navigationTitle("Infer")        .onAppear {            do {                voiceIdentifier = try  VoiceIdentifier()
            } catch {                alertMessage = "Error initializing inference session, make sure that training is completed: \(error)"                showAlert = true            }
        }        .alert(isPresented: $showAlert) {            Alert(title: Text("Error"), message: Text(alertMessage), dismissButton: .default(Text("OK")))        }    }}
struct InferView_Previews: PreviewProvider { static var previews: some View { InferView() }}InferViewの完全な実装はこちらで見つけることができます。
ContentView
Section titled “ContentView”最後に、デフォルトのContentViewを更新して、TrainViewとInferViewに移動するボタンを含めるようにします。
import SwiftUI
struct ContentView: View {    var body: some View {        NavigationView {            VStack {
                Text("My Voice")                    .font(.largeTitle)                    .padding(.top, 50)
                Spacer()
                ZStack(alignment: .center) {                    Image(systemName: "waveform.circle.fill")                        .resizable()                        .aspectRatio(contentMode: .fit)                        .frame(width: 100, height: 100)                        .foregroundColor(.purple)                }
                Spacer()
                HStack {                    NavigationLink(destination: TrainView()) {                        Text("Train")                            .font(.title)                            .padding()                            .background(Color.purple)                            .foregroundColor(.white)                            .cornerRadius(10)                    }                    .padding(.trailing, 20)
                    NavigationLink(destination: InferView()) {                        Text("Infer")                            .font(.title)                            .padding()                            .background(.purple)                            .foregroundColor(.white)                            .cornerRadius(10)                    }                    .padding(.leading, 20)                }
                Spacer()            }            .padding()        }    }}
struct ContentView_Previews: PreviewProvider { static var previews: some View { ContentView() }}ContentViewの完全な実装はこちらで見つけることができます。
iOSアプリケーションの実行
Section titled “iOSアプリケーションの実行”これで、アプリケーションを実行する準備が整いました。シミュレーターまたはデバイスでアプリケーションを実行できます。シミュレーターおよびデバイスでアプリケーションを実行する方法の詳細についてはこちらを参照してください。
a. アプリケーションを実行すると、次の画面が表示されるはずです:
b. 次に、TrainボタンをクリックしてTrainViewに移動します。TrainViewは、声を録音するように促します。声をkNumRecordings回録音する必要があります。

c. すべての録音が完了すると、アプリケーションは指定されたデータでモデルをトレーニングします。トレーニングの進行状況を示すプログレスバーが表示されます。

d. トレーニングが完了すると、次の画面が表示されます:

e. 次に、InferボタンをクリックしてInferViewに移動します。InferViewは、声を録音するように促します。録音が完了すると、トレーニングされたモデルで推論を実行し、推論の結果を表示します。

以上です!うまくいけば、あなたの声が正しく識別されたはずです。
おめでとうございます!オンデバイストレーニング技術を使用して、簡単な音声分類モデルをトレーニングできるiOSアプリケーションを正常に構築しました。これで、アプリケーションを使用して自分の声でモデルをトレーニングし、トレーニングされたモデルで推論を実行できるようになりました。アプリケーションはGitHubのonnxruntime-training-examplesでも利用できます。